Tuesday, July 22, 2014

Combating Powdery Mildew

The rainy season continues.  In the Month of June we had a little over 15 inches.  So far this July we have had 13 inches (not counting today) and still a week left to go.  Rainy season means the biggest gardening task is combating powdery mildew.

Powdery mildew is a disease caused by the fungi Erysiphales.  It is a real problem when the humidity and heat rise and will significantly reduce the harvest of your garden. 
powdery mildew

The bad news is that I have it on some of my okra in the aquaponic gardens. Because of the fish component in aquaponic gardens, you must be careful that what ever you place on the plants will not harm the fish or the fish's environment.  The good news is that it is fairly easy to combat with non-toxic substances like baking soda. 

use baking soda to treat powdery mildew
Every day for the last week or so I have said I need to treat that powdery mildew, but the rains have beaten me every day. So this morning I got an early start and before it rained, I mixed a solution of  2 teaspoons of baking soda into 1 cup of water.  If you need to make a larger batch, that is a 1:24 ratio of baking soda to water.  Here is a picture of the ingredients and tools (along with the morning's harvest of okra).  I like to harvest before I do any treatment.

Baking soda is alkaline (that means it has a high pH) and anything with a high or low pH will kill mold.  Powdery mildew may have a fancy name, but it is just mold.  Because I want the alkaline mixture to get the mold but not mess with the pH of the fishes' water, I applied it with my basting brush.  If I were doing this in a soil garden, I would make a big batch and just spray it on the leaves.

As you can see, this okra is doing really well.  The leaves are huge!  But they do have powdery mildew.  I
powdery mildew on okra
Okra on DWC raft
have been eating from the okra plants in the aquaponic gardens for about 2 weeks now.  The okra plants in soil have just started to flower.  Most of the gardeners I know in South Florida take the rainy season off. They are all amazed that I am able to grow anything right now, even though it is mostly okra and purple hull peas.

Speaking of purple hull peas, would you look at these beauties!  If you are not familiar with this plant, it is a legume and produces a shelling pea.  The pods start off green and then turn the most beautiful color of purple as they ripen.  The taste is a bit milder than a black-eyed pea,
but they do have a black eye.  It is a plant that used to be common (like kohlrabi) but has fallen out of favor.  I am hoping that the new interest in heirlooms will bring back the popularity of this plant.

The one thing that really likes all this rain is the lemongrass.  I can't cook with it fast enough to keep in in check.  If you have any ideas for cooking with lemongrass please share them. Because it is growing like mosquitoes with all this rain.


Speaking of which, I just finished treating and taking pictures when I heard the first rumble.  When I look around this is what I see!

Thursday, July 3, 2014

Okra in Aquaponics

It has been awhile since I've posted.  As I've written before, there is not much gardening that goes on in South Florida once the rainy season starts.  Our temperatures are in the 90's almost everyday.  In the month of June we had over 15" of rain and that was before our first brush with tropical weather.  To say that it is hot and humid would be like saying the Atlantic Ocean has a little water in it.

It is very hard to grow anything edible in those conditions (well except that the mangoes and avocados are getting ripe).  The irony of all ironies is that I can grow a few things using aquaponic techniques during this time.  Yes, plants that would drown from all the rain if they were planted in soil will do OK if they are planted in water.  They just must be plants that can take the heat.

Right now in my at home aquaponic gardens, I have purple hull peas, mint, lemon balm, rosemary, vinca, french marigold, oregano, miniature pepper,  green onion, and lots of okra growing.  The okra are the plants from the Floaters versus Sinkers seed wars I chronicled.  As I suspected, there is really no difference between the floater and sinker seeds once the seedlings were planted.

However I am seeing a difference in how the okra is growing using different techniques.  Unfortunately I don't have photos of  the plants that were growing the best.  These were the plants that were in NFT tubes.  Even though the okra variety is Cajun Jewel, a dwarf variety, they still get several feet tall.  Once I could no longer reach the plants in the tubes, I had to take them out and transplant them.  This involved pruning both roots and tops.  I re-established them in my newest  media grow bed with my purple hull peas and due to the pruning they are now the smallest of the plants.  Bonsai okra so to speak.

okra in aquaponicsThe okra in the DWC (deep water culture) rafts are growing steadily.  However they have not flowered and produced fruit yet.  As you can see, the plants are exceptionally healthy and should be flowering any day now.  By the way, the crud on the raft is caterpillar poo.  Hubby thought it would be nifty to put some zinnias on the raft, but instead grabbed some of my milkweed seedlings.  Needless to say it only took a few days to have monarch eggs and within 10 days they had hatched, eaten every bit of milkweed on the raft, and then conscripted into the caterpillar relocation program (CRP).

The okra that were planted in media beds filled with hydroton and gravel are also doing well.  They have just started to flower.  What is odd about this set outperforming the set in the raft is these plants receive an eastern exposure.  The plants in the raft get a southern exposure.  Southern exposure equals more sun, however the eastern exposure plants are outperforming their southern kin.  I know that there are people sold on DWC for all plants, but it has been my experience that in most instances plants in media beds do better.  Maybe I am doing something wrong, but I get more nitrates using a media bed than depending on the biofilm on the raft.

The current superstar okra (since their kin in the NFT tubes got the bonsai treatment) are the okra that are in a bed of lava rock and a small layer of gravel.  I really don't like planting in lava rock because even with gloves on your hands it is hard work and always seems to ruin my manicure.  But those lava rocks provide an incredible amount of specific surface area for the nitrifying bacteria to take hold.  The honeycomb
structure is similar to zeolite.  These okra plants have already begin to bloom, fruit, and produce their first harvest.  The okra have already crowded out the bottom row of NFT tubes that are mounted over the bed. I am planning on using that tube again when the okra get just a bit taller.  As I did last year, I will use the okra as a shade for other plants on that bottom tube.  This system is getting southern exposure like the DWC system, but it is doing so much better.

I was joking with a fellow gardener on-line this morning that I know so much useless information about okra.  It is in the same family as the hibiscus and cotton.  If you have ever seen an okra bloom, you know that they are very beautiful flowers.  And if you time time to actually look at an okra bud and bloom then you can easily see how hibiscus and okra are related.  The buds and flowers are shaped in a very similar manner.
okra in aquaponics bloom
I know lots of people don't like okra, but I think you just have to give it a chance.  It is only slimy if you boil it.  People eat oysters and they are slimy!  If you have an overabundance of okra, pick it while it is small and make pickles.  I like them pickled hot, bread and butter, or dill style.  I don't think I have ever made the acquaintance of an okra pickle that I didn't like.  I can't say the same for cucumber pickles.  Besides what would gumbo be without okra?  Okra is the defining ingredient in gumbo.  If it isn't thickened with okra, then it is just another soup. And okra makes an excellent fried vegetable. 

 By the way, I planted some of my okra seedlings in soil on the same day as I placed the others in the aquaponic gardens.  I've even given them a little fish emulsion to try to make things even.  The growth of the plants in soil can't be compared to even the slowest growth of the plants in the DWC system.  The soil based plants are not as richly colored and have not produced a bud or bloom yet. Their leaves are smaller and the plant stems thinner.  But they do attract visitors.  I wonder if this monarch is related to any of the 'pilars that started out on the DWC raft?  

If you have never tried to grow okra, I encourage to give it a shot. It is very forgiving and once it gets going is a prolific producer.  Even if you grow in soil, I still recommend growing the dwarf varieties because okra can get tall.  And last but not least, be sure to save some of your seed.  All of these plants are from last year's seed.

OK, I've shown you my okra......let's see yours!

Monday, June 2, 2014

Aquaponics Doesn't Have to Be Ugly


My hubby has been itching to build a new aquaponic garden.  He has had an IBC tote cluttering up the garage for several weeks.

The problem is that we are running out of space.  We do not have much growable space to begin with.  Some of what we do have is shaded.  The areas that get enough sun for growing edibles are already occupied by aquaponic gardens or conventional soil beds.
Little Okra

He has been eying our swimming pool deck and commenting about the abundance of sun it receives.  Of course it does, who puts a swimming pool in the shade?  I could see where the hints were going.  By the time he said he wanted to put an aquaponic garden by the pool, I had accepted that this was going to happen.  I just wanted to minimize the damage. 

By damage, I mean that our house is built around the pool area.  It is visible from most rooms in the back of the house.  I did not want to look at something ugly.  Let’s face it, most aquaponic gardens are collections of tubs, barrels, buckets and lots of pipes and tubing.  These components are not terribly attractive.  While our existing aquaponic gardens are not eyesores, they are not exactly things of beauty.  Even though they are full of beautiful growing things, I don't want something like that the focal point of the back of my house.

I was willing to compromise (one of the reasons we have been married for over 30 years) and he was willing to compromise (another reason our marriage has lasted so long).  I agreed to the IBC, if he agreed to do some extra work so that it was not an ugly eyesore.

IBC Aquaponic Garden
Voila!  He clad the system in pressure treated lumber so that it will withstand the elements and from the house, it almost looks like a hot tub! The bottom holds 125 gallons and the top gives us a grow area of roughly 4 feet by 4 feet. Plenty of room for the tilapia and veggies!  He fitted it with a bell siphon, but I would like to change it over to a timed flood and drain. I like the way that method performs on the larger systems.

This past week end we began cycling.  Because I can’t stand for the fish to die, we are cycling with ammonia.  You can read my January post about my experiences cycling with and without fish and come to your own conclusions about cycling with fish.

Just to start, I put in some purple hull peas and Cajun Jewel okra.  I already have plenty of okra in our other grow beds and even some in rafts and NFT tubes, so I think we can expect a large crop of okra.  Unfortunately, because it is the rainy season, there is very little we can grow.  Summer in South Florida is like winter in the Midwest or North, there are very few edible plants that can survive.

Which brings me to an RIP moment.  One of the first thunderstorms that came barreling off the Everglades produced a lightening strike that has taken out one of my coconut palm trees.  As you can see in this photo, the tree is dying and you can even see the stripe on the tree trunk where the lightening exited. 
Coconut Tree with Lightening Scar
 It appears that the areca palm next to the coconut is a goner as well.  The areca only went in after hurricane Wilma.  The coconut is over 20 years old.  I  will miss them.  Its like saying good-bye to an old friend.

Areca with burned fronds
Do you get attached to your trees?

Tuesday, May 27, 2014

Hurray for Volunteers!

I had this post ready to go and then decided to hold off because of the Memorial Day holiday.  Memorial Day is a special day when we should pay our respects to those who whether they were drafted or volunteered, they gave their lives in service to our country.  It seemed a little disrespectful on Memorial Day to equate a self-seeded plant with a service person.  So I really mean no disrespect when I say with enthusiasm HURRAY FOR VOLUNTEERS!

I call plants that self-seed and sprout "volunteers" as do many gardeners.  These sprouts are plants just doing what nature intended.  The seeds fall or are blown then land and sprout.  If you have plants that freely self-seed you should consider these volunteers a blessing.  You didn't have to buy the seed or plant the seed, it just volunteered to grow for you.  I count them as blessings for the most part.

Of course, volunteers rarely volunteer to grow exactly where we want them to be.  I see no harm in requesting that the volunteers relocate; and in my garden they participate in the VRP (volunteer relocation program).  When I spot a volunteer, I usually dig it up and put it in a small pot until I can decide its permanent location.  When it is either a plant that will grow very large (like an Everglades tomato) or a plant that will stay very small (like a torenia) I skip this step because I usually know where my large and small spaces are located in the garden.
All Volunteer Basket

So when you are weeding, pay attention to what you are pulling up.  For example, this pretty hanging basket has a sunny yellow purslane in it right now.  This entire basket self seeded from last rainy season.  During the dry season, it was full of zinnias.  But, the zinnias all have died back and the purslane started to sprout. I recognized the sprouting plants and I just let it go.

I was weeding the gravel area under where the pot hangs and spotted this.

So I dug it up and put it in a little pot.  You should see it now!  I think I will start another basket if I get a few more volunteers.

Lately, I have been crazy for polka dot plants.  I don't know what it is about the mixture of pink and green on the leaves but it always make me smile just to look at it.  I have polka dot plants growing in both my Florida and North Carolina gardens.  They don't get very large, but sometimes when you look around where they are growing you will see these. 
Volunteer Polka Dot Plants


When I find them, I am digging them up and collecting them until I have enough to start a large pot.  I don't want to put them in the ground because as slow growers they will get choked out by the more vigorous growers.

And speaking of vigorous growers.  My cuban daisies think it is their purpose to take over every inch of soil everywhere in Florida.  I confess that I pull many of these up and toss them as weeds.  However, I do relocate plenty because the butterflies and bees are just crazy for this plant. 
Cuban Daisy

The blooms only last one day, but the plant is a prolific bloomer and the butterflies and bees will wear out a bloom in one day with so many visits.  I don't know if the bloom could stand a second day with so much company.


Cuban Daisy Volunteer & Weed


One year my mother had a volunteer watermelon plant sprout in the crack in the paved area behind her house.  She left it alone and in addition, didn't let anybody park there. We were amazed as the watermelon took over the area, flowered and fruited.  If she had intentionally planted the seed in that crack it would have never sprouted, much less produced.

Transplanted Purslane Volunteers


Volunteer Polka Dot Army   


So what are your favorite volunteers and what is the strangest place one has every sprouted?


Monday, May 19, 2014

Floaters versus Sinkers - Seed Wars

When it comes to planting okra, I always like to soak my seeds for a day before planting.  I am sure there is a highly scientific reason that okra seeds should be soaked, but I do it because my father always told me "Cheryl, soak your okra seeds before you plant them."  He has been dead over 15 years, but I still do what he says.

Soaking this last batch of Cajun Jewel okra seeds, I noticed something strange.  Some of the seeds floated on the top and some sunk to the bottom.  As many times as I have planted okra, I couldn't remember if I had ever seen this before.
Floaters and Sinkers

It is possible this happens every time and I have never paid attention before.  Honestly soaking the seeds is usually one of those "Oh Crap" things you remember just before you go to bed.  You are in your jammies, turning out the lights and locking up the house when you remember that you were planning on starting those okra plants the next day.  So the standard practice is usually to find the seeds, dump them in a glass of water and go to bed without giving it another thought until I am ready to plant them the next day.

This time I remembered so far in advance that I paid attention to what I was doing when I popped the seeds in the glass.  Immediately I noticed floaters and sinkers.

I had a theory about floaters and sinkers.  I decided that the floaters didn't have much to get them started and that they would probably not germinate at all.  I hypothesized the sinkers were better seed and would have a higher germination rate and would grow faster.

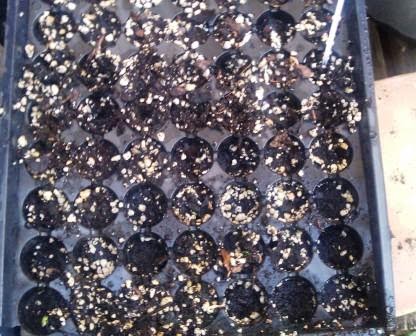
So, the next day I carefully separated the sinkers from the floaters.   The floaters went in one starter flat and the sinkers went in another starter flat.  They were placed in the same area so that they would receive the same amount of water and sun.

I planted them on Thursday afternoon and as you can see that by Sunday morning there was a definite difference in the germination between the floaters and sinkers.  The floaters were sprouting away and the sinkers not so much.
Sinkers on Sunday May 11

I waited until Tuesday to check on them again.  At that point, the floaters and sinkers were the same size!!!!

So, the sinkers germinated quickly, but once germinated didn't grow up any faster than the slower germinating floaters. 
Floaters on Sunday May 11

Unless you are in a really short growing season and you need those extra two days, there is no difference between your floaters and sinkers, except that some float and some sink.

I transplanted both floaters and sinkers into flood and drain grow beds.  I have one bed filled with lava rock and the other filled with hydroton.  I also set a couple of floaters and sinkers in a DWC raft.  I also put one each floater and sinker in soil.

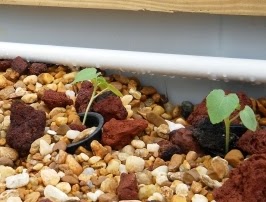
Since transplanted on Saturday, floaters and sinkers in the lava rock have produced their first true leaves.  The floaters and sinkers in the hydroton and the DWC raft have not produced true leaves yet.

As you can see in the photos I took today (Monday), in the lava rock grow bed, there is no difference between a floater and sinker.

Floater and Sinker on May 19


So, don't throw out your floaters. 

Stay tuned for updates during the growing season.

Monday, May 12, 2014

The Survivor's Garden

In this blog I have covered what it takes to survive in the garden and what it takes to survive gardening.  Today I am privileged to tell you about a very special garden for survivors.

This past Saturday I was honored to visit the Alexander "Sandy" Niniger Veteran's Nursing Home in Pembroke Pines, Florida.  This facility may be small (only 120 beds) but it provides dedicated care to our nation's veterans with dementia and Alzheimer's disease.

The facility had a small, rarely used garden area that had fallen into disrepair.  Enter a young man by the name of Jake Cairo.  Jake had a vision to make this small space a place where the veterans could get some sunshine and fresh air, enjoy the singing of birds, and watch the flittering of butterflies and the buzzing of bees.

Jake met with landscapers and nurserymen to determine what would grow best in the area.  He figured out how to work with the foundation plants and irrigation that were already in place.  The podacarpus could stay if it were trimmed to a hedge and the Firespike could be saved as well.  Then he pondered how to honor these veterans of the various branches of the military.


 A plan began to form and he consulted with some trusted adults to see if he was on-track.  Then Jake went to work.  He ordered special stones engraved with the different branches of the military.  These are real stones, not plaster or plastic imitations!

 He recruited friends, family, and fellow teens.  They went into a frenzy and transformed the area into a place of beauty that could bring joy to people whose lives were growing dim due to the ravages of dementia, Alzheimer's and other deteriorating mental conditions.  Hedges were trimmed, birdhouses refurbished, plants installed, and mulch spread thick enough to slow down those relentless weeds.

The day I visited, there were butterflies aplenty and a mockingbird went from rooftop to treetop.  This bird sang every song in its repertory. A song fit for survivors of all stripes.  Those who never give up, those who keep pushing on, those who we must remember...even as they themselves forget and are forgotten.
Native Porterweed

Oh, did I mention that the young man who took on the planning and execution of this garden rehabilitation is Autistic?  Yes, Jake Cairo is on the Autism Spectrum; and this garden was his Eagle Scout project.  Jake took on what most kids wouldn't dream of, much less accomplish.  From the time he began scouting Jake was determined to become an Eagle Scout and give back to the community.  I would say he has met his goal. Jake says this is just the beginning and plans to be an adult volunteer in the Boys Scouts of America.

So let's pause now to honor those who serve, like the veterans at the Sandy Nininger Nursing Home and those like Jake Cairo who are willing to overcome their own obstacles to serve those with greater obstacles.


Monday, April 28, 2014

Use, Re-Use, and Use Again

Here in South Florida, our vegetable growing season is drawing to a close.  While those of you in the South and up North are planning and starting your gardens, we are winding down.  We really only have two seasons here, dry and rainy.  We grow our traditional vegetable gardens in the dry season that starts in October.  Many of the vegetables that you have been eating this winter were grown in far south Florida, far south Texas, and southern California.  Our rainy season usually starts no later than the 3rd week of May.  Once the rainy season starts, temperatures soar, humidity rises, and it rains at least once a day.  Now that doesn't mean that it rains all day long.  It means it usually rains sometime around lunchtime and then again around 3 or 5.  The rain doesn't last long, but that rain along with the heat and humidity is enough to discourage most vegetables from growing.

So, we are busy planting our okras and southern peas because they are about the only edibles that can survive. However, there are lots of non-edibles that keep a gardener busy in the rainy season.

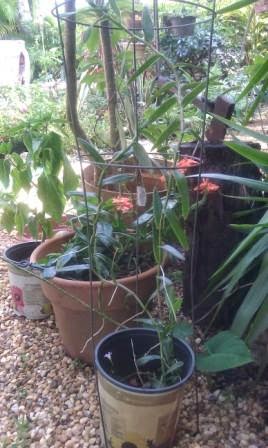
As I go through the season transition process I am taking things down and finding new uses for them.  For example, this tomato cage is no longer needed for its Mr. Stripey resident.  I will be using it again in the fall when I start my soil tomatoes again but until then it is out of a job.
Re-Purposed Tomato Cage

Or maybe not!  As I was walking to put it away, I thought why couldn't this cage
support one of my ground orchids that started to run out of control.  I recently
thinned out my ground orchids and put some of them in pots (keep reading to
find out about my re-used pots).  One of them was so gangly I wasn't sure what to do with it.  It was healthy, so I hated to toss it, but it had a terrible growth habit.  I potted it up and sat it where it could lean on a plumeria while it got its act together.  So, enter Mr. Stripey's tomato cage.  Instead of putting the cage away I paused with the cage in my hand as I walked past that pot.  I ended up putting that cage around the pot with the gangly orchid in it.  So, that plant has all rainy season to get its act together and get some roots long enough to support it.  Come fall that cage has got to get back to its real job of supporting a tomato.
Use as designed, re-used off-label so to speak, and then use again for its original purpose.  Works for me!


Basket lined with fronds
Another thing I have been doing is lining hanging pots with dried palm fronds.  I have way too many palm trees.  This means way too many palm fronds.  I used to buy liners made from coconut hair for my hanging baskets.  Then I decided why should I do that when not only did I have palm hair but I had an excess of palm fronds in my yard.  I found that through trial and error that the fronds from robellini, cats paw and areca palms made the best liners.  It was simply a matter of cutting the main vein from the fronds and then forming them inside the basket.  I trimmed off any excess frond to make it neat.  Then all I needed to do was fill with soil and plant.  The fronds hold in the soil.  Just like to coconut hair, they slowly decompose.  When they are done, all you have to do is dump them in the compost pile and they are already partially decomposed. 
Frond line basket

Lastly, if you didn't notice in the ground orchid picture, I use pots over and over and over again.  I have been known to buy a plant on "Death Row" (the discounted plant rack) just because I want the pot.  Even the cheap plastic grower's pots are great for starting out plants.

And of course almost all components of our aquaponic gardens are off-label.  We have used cement mixing containers for grow beds and Rubbermaid storage containers for fish tanks!

What crazy ways do you re-use things in your garden? 

Monday, April 14, 2014

How to Survive the Occasional Garden

You may know that I garden in the soil and using aquaponic techniques in South Florida.  Our climate and pests can make gardening in zone 10B a real challenge.  But it is not the largest challenge in my gardening life.  My largest challenge is maintaining the gardens in my North Carolina mountain cabin.

I may be there one week a month, three weeks a month, or not at all for months on end.  Just because I am not there on a regular basis does not mean that I accept that I can't have beautiful gardens.  It just takes lots of planning and dependence on some old, time-tested plants and a few new ones as well.

The first challenge in my North Carolina mountain garden is that it sits at 3,200 feet in a mixture of clay, rock, and some pretty good soil...it just depends on where you dig.  It sits in USDA Zone 5B and I have spent my life gardening in Zones 8, 9, and 10.  In other words, a totally different part of the south where winters are milder and you almost never see the mercury plunge below freezing for long.  So the first thing was learning to garden out of my comfort zone.  I depended quite a bit on regional gardening boards, the University of North Carolina, and the gardening column in the local weekly paper.

My second challenge was to find plants that could thrive in the sunshine in the spring when there are no leaves on the trees, the dense shade in many areas once the leaves are on the trees in the summer, and the brutal cold of winter with the first snowfall happening in October or November.

I realized within the first year that annuals are pretty much out of the question, except as accent plants. My go to plants became the ones that are either hardy evergreens (like boxwood) or plants that become dormant in the winter and resume growing in the spring.  Bulbs are great for this!

Hurray for daffodils, crocus, tulips, iris, daylillies, gladiolas, and hostas!
Daffodils in Snow
These bulbs/corms can provide a procession of color in a bed without much fuss or muss. They don't need heavy fertilizing and can thrive on neglect.  Just a little dividing every once in a while and a covering of leaves in the fall are about all the attention they require.  The crocus and daffodils begin the procession of color.  They will even sprout and bloom through the snow.

Daffodils without Snow
Daylilly 
Next come the tulips and iris to end the Spring season.  Come summer, the daylillies, gladiolas, and hostas  provide colorful foliage and pretty flowers.  The daylillies are particularly handy when you are planting on a slope and need good roots to prevent erosion. 

Hydrangeas are a great bush for the occasional gardener.  They grow and bloom each year from the prior year's growth.  The don't need any sort of pruning unless you are looking to simply control the size of the plant.  My experience is that few pests want to eat the plant but the birds and butterflies love them.  Because they are dormant in the fall and winter months, you don't have to worry much about them freezing.  We have had below zero temperatures and the hydrangeas didn't seem to mind a bit: they just slept on.
Oakleaf Hydrangea

Other great bushes that are fairly fuss-free are azaleas, buddleias, and camellias.  I have been told that camellias can have pest problems but that has not been my experience so far.  If you are in a cold zone, just make sure that you select a camellia that is cold hardy.  Some are and some aren't.  I learned the hard way.  Another great blooming plant that can take the cold and neglect is the rhododendron.  It will bloom in the shade, part-shade or even the sun.  It's cousin the mountain laurel also prefers to be left alone, making it a great choice for the occasional gardener.

Speaking of plants that want to be neglected, no occasional garden would be complete without a knock-out rose or two or three.  I love roses, but can only grow them in pots in south Florida because of our nematode problem.  In North Carolina, they can be grown in the soil but require care
Knock Out Rose
enter the patented Knock Out Rose.  I have both single and double types and both perform beautifully.  Come winter you just know they are dead because they don't have a leaf on them, but in spring they start to grow quickly.  Because I have such shady areas, it is important to have plants that aren't prone to mildew problems.  I haven't had a bit of mold problem with these roses at all.  Makes me think about replacing the ones I have in my full-time garden!

If you notice the one thing I have not mentioned in the occasional garden is the presence of grass.  Having a lawn is labor-intensive.  You have to feed it to encourage it to grow and then turn around and mow once you are successful in getting it to grow.  If you aren't going to be around on a regular basis, you aren't going to have a great lawn.  My approach is to let the grass that wants to grow go ahead and grow and I pay someone to mow all three acres that has some form of grass on it once a month once the weather is warm, and weed eat the non-mowable areas every few weeks.
Hosta

Whether you own a vacation home and are looking for gardening tips or you just want a beautiful garden without putting much work into it, I hope you will use these ideas to create your own garden that only needs your occasional attention to survive.  If you want to visit the Smoky Mountains and see what is blooming in my garden, go to Cabin On a Creek and check availability.  It's the occasional gardener's place where peace and quiet come together.

Thursday, March 27, 2014

Worms in Aquaponics?

Last week I was cleaning out one of the beds that uses a continuous flow technique.  The plants had become so overgrown that it was time to do some serious pruning.  Because I was removing so much of the top of the plants I thought it would be a good idea to prune the roots as well.  These Everglades tomato plants are so hardy and they really respond to this pruning technique.

The grow media in this particular bed was a base of pea sized gravel with about 2 inches of expanded clay (Hydroton) on the top.

When the bed was first set up, I put some earthworms in there just to see how they did.  The answer to that question is..... they did wonderful thank you very much!  The earthworms help break down solids from the fish tank and help keep your grow beds clean.  They also assist with "mineralization" which is a fancy term that means they convert their food to available nutrients for the plant roots.  If you read much about serious aquaponics then you will run across the use of worms, but not earthworms.

My earthworms didn't know that they were not the preferred worm for aquaponics.  Each time I dug up some roots to prune I came up with enormous earthworms!  Now I know many aquaponic enthusiasts are crazy for red wigglers for their worms, but I am liking earthworms.  The first and foremost reason is because earthworms are cheap.  They are already growing in our compost beds.  We don't have hardly any red wigglers in our compost.  Maybe they aren't indigenous to South Florida.  I don't know, I just know that if you want red wigglers you have to buy them.

Because our compost pile is fed with bunny manure, I purge the worms before putting them in the bed.  I don't want to introduce any e.coli from our furred friends into the aquaponic gardens. 

Purging the worms is easy, just put them in a small amount of moistened corn meal for a few hours and they will have the equivalent of terrible diarrhea and vomiting. It is gross when you look in and see all that black gunk in the cornmeal, but the worm is clean inside and out.

I just give them a quick rinse in some water from one of the fish tanks and then into the bed they go and boy do they grow!

I put just a few earthworms in there when I set up the bed with the tomatoes at the end of last summer and now it is full of earthworms.  I have been routinely adding worms to each new bed that we set up, but I haven't done much in the way of digging around to see how they were doing.  Out of sight out of mind is the way they have been operating.

So I say if you don't have some worms in your grow beds, get some.  You may not have to go any further than your compost pile.

So do you use worms in your aquaponics beds?

Friday, March 14, 2014

Krazy for Kohlrabi!

Kohlrabi is a forgotten gem.  With the resurgence in interest in heirloom and other older vegetables kohlrabi may be poised for a comeback.  Look at how kale is the current trendy food when not too long ago it was eaten only because it was cheap and easy to grow.

Kohlrabi is the royal cabbage.  While it looks like a root vegetable, it is actually the stem of the plant you eat.  The name comes from the German for Cabbage Turnip.  When you look at kohlrabi (especially the purple varieties) you can see how it looks a bit like a turnip.  However, it is a member of the Brassica family.  Just like cabbage, broccoli, cauliflower, and brussel sprouts it has been selected by man for the characteristic of the bulging stem.


Looks Like a Turnip Tastes Like Broccoli


I am currently growing them using a flood and drain grow bed, deep water culture rafts, and nutrient film technique tubes.  Much to my surprise they are growing best with NFT.  I really thought they would excel in the grow beds and that they would be too top heavy for rafts or tubes. 

They do lean in DWC rafts and for some reason their bulb becomes elongated.  Doesn't change the taste but if you are growing for looks, well it looks odd. 
Leaning Tower of Kolhrabi


If you are growing for looks, you probably aren't growing kohlrabi to begin with because well
                     it is an odd looking veggie.
                                                                 Isn't it?


Kohlrabi can be eaten raw or cooked.  The taste is like the stem of the broccoli with a little bite of radish thrown in for a kick.  The smaller the "bulb" the more tender it is.  No matter the size, you certainly want to peel it before you eat it cooked or raw.  It has a very tough outer skin.

It is used in Asian and German cooking.  I prefer it cooked, but that is probably because that is how my Mom cooked it. 

If you look on the internet, you will find recipes for cooking the bulb and leaves.  I've never eaten the leaves....I was taught incorrectly that the stems and leaves were toxic to humans.  As an adult, I realize my Dad probably just said that because he didn't like the leaves. 

If you want to try it for yourself, it is very easy to grow in soil or in an aquaponic garden.  It likes cooler temperatures so you can direct sow seeds outdoors 4 to 6 weeks before your last frost.  So get them in the ground soon! They like a pH in the 6's and they need water to develop that fleshy stem.  If you grow in soil, beware that they have shallow roots.  Keep them well mulched if using soil. I haven't had a problem with cabbage worms but I did have to spray for aphids with my pepper/garlic spray (read about that here) on one set of tubes.  If using aquaponics, give them a try in NFT tubes.  I've been getting great results in both small and large tubes.

Are you krazy as I am for kohlrabi?

Wednesday, March 5, 2014

Small Tomatoes with Large Taste and Free Seed Offer

I just love small tomatoes!  They are perfect for sneaking a taste when working out in the gardens.  You can be hot and sweaty but that burst of juice in your mouth and the combination of sweet and acid on your tongue can be mighty refreshing.  Even when it comes in a very small package.

I read one time that there are about 10,000 varieties of tomatoes.  They fall into two categories:  determinate and indeterminate.  The determinate plants are a bush variety and grow until they set fruit (yes a tomato is a botanical fruit) on the terminal bud.  Then all fruit ripens over a 1 to 2 week period.

I like to grow indeterminate tomatoes.  For most of the country, this means that they will grow until killed by frost.  Since I live where we never have frost, we plant in the fall and our tomatoes grow until they are killed by the heat and moisture from our rainy season (sometime in May).

Most varieties of the smaller tomatoes are of the indeterminate variety.  This means you can enjoy their goodness all season long. 

Right now I am crazy for Yellow Pear and Everglades tomatoes.  Let's face it, who wouldn't be crazy about a tomato that has a waist? 
Just look at these little gems from the garden. Scarlett O'Hara herself would be green with envy of that small yellow waist!  And no corset was needed.  No pear has ever been as adorable as my yellow pear tomatoes.  They originated in Europe in the 1700's and fell out of fashion for a bit but have come back in a big way for such a small tomato.  While considered a "sweet" tomato, I think they are on the acidic side and taste tart.  They are yummy when tossed in salads, as a topping for frittatas, or simply enjoyed with a few leaves of basil, a pinch of salt, and a dash of oil and balsamic vinegar.

The other tomato that I am crazy for this year is the native Everglades tomato.  This is the only tomato that is native to South Florida.  Not only is it indeterminate but it can stand up to the heat and torrential downpours of our rainy season.  I have Everglades tomato plants in an aquaponics flood and drain bed that are almost a year old!  They grow on sprawling vines and produce in clusters of 8 or 9 like a cherry tomato.  I don't think you can kill an Everglades tomato.

If you look at this photo, I set one Everglades tomato on a quarter so you would have perspective on the size of this mighty tasting tomato.  It might be a small tomato but it has more sweet taste than any large beefsteak

These are addictive when eaten in the garden. It really is hard for me to get them to the house.  But if they make it, they are perfect in a salad.  Or eaten out of hand.  Good thing I have them everywhere...which leads me to the free offer.

I want to see the Everglades tomato get the attention it deserves.  If you will email me at allergycheryl@gmail.com and in the email subject put "Free Seeds" I will email you back with my address.  You can send a self addressed stamped envelope and I will send you some free Florida Everglades tomato seeds.  Then you can enjoy this awesome small tomato with a very very large taste